The Finale
|
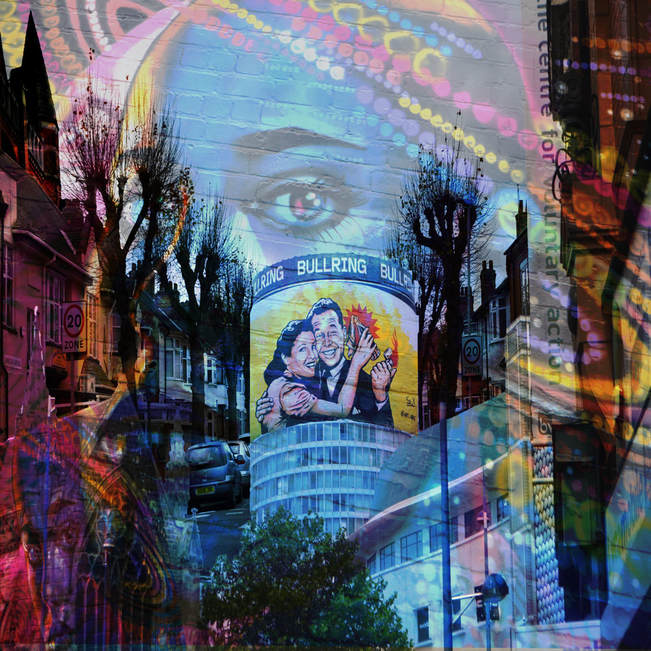
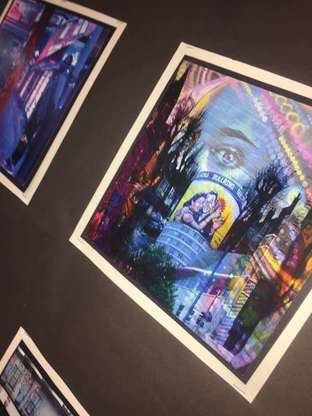
After countless hours of adding different layers on layers and several transformations, this was my final piece. This picture contains many different pictures taken in Melton Road, Leicester and Birmingham, showing the two different cultures in art found there. The final piece brings a whole new image of the streets of Leicester, showing how epic it truly can be if it was to be influenced by Birmingham.
This piece allowed me to experiment with several tools in Photoshop but also it also stretched the amount of effort I must have put to get a great outcome. |
|
|
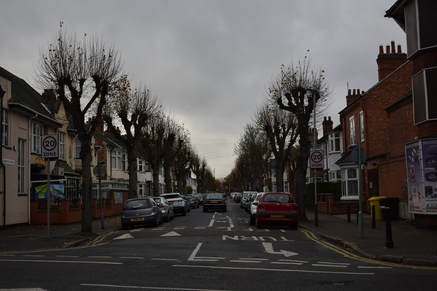
This was the first layer that I used to start up my final piece. You could call this the foundation. This is a street found in Leicester, with it running down to the end accompanied by many trees. To people who live in Leicester, it's seen as a city of colours and lights especially around the time of festivals but we always have the 'great' british weather that gives it's dull image.The grey skies really give an overall view to Leicester but I had planned to change it all.
|
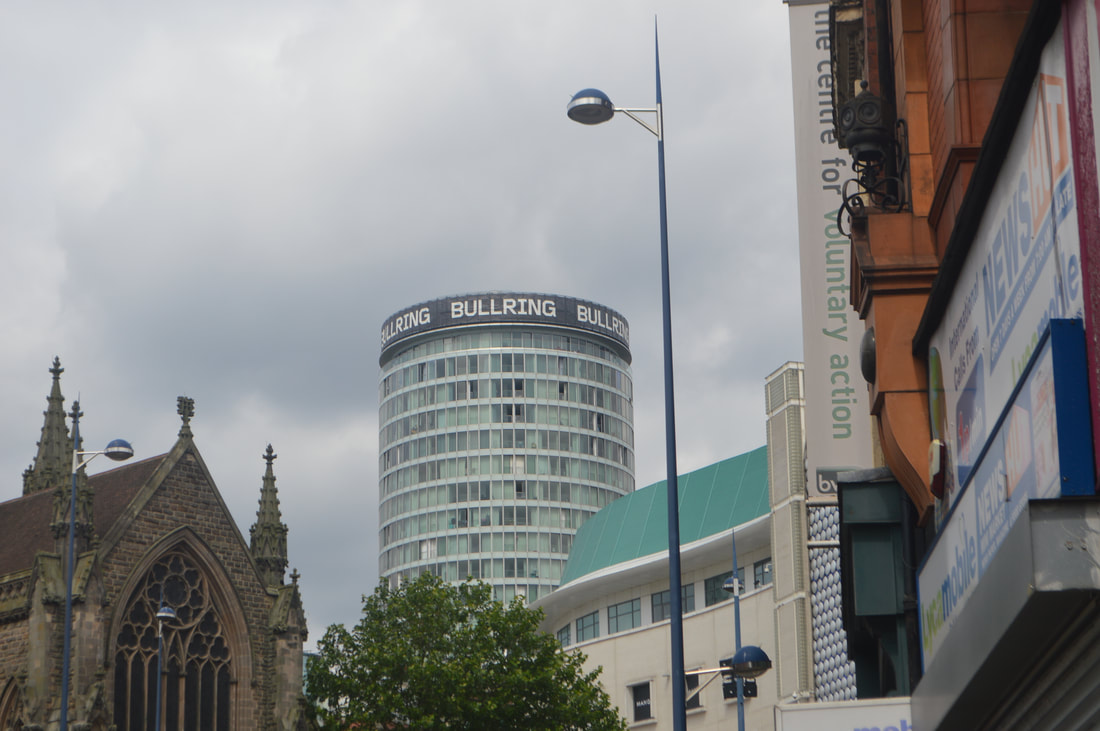

These were the images that I used taken from Birmingham in my final piece. With the first picture, I cut out the background after selecting that layer, using the quick selection tool. An easy way for you to get the tool is by pressing 'W'. Then you drag across the part of the image you want to select and you press 'Ctrl C' to copy then you press 'Ctrl V' to paste. This new image pasted will become a new layer. A tip I learnt whilst doing this was to make sure you have clicked on the layer your trying to quick select because if not, it'll be hard for the mouse to recognize of the image and it wouldn't select right.
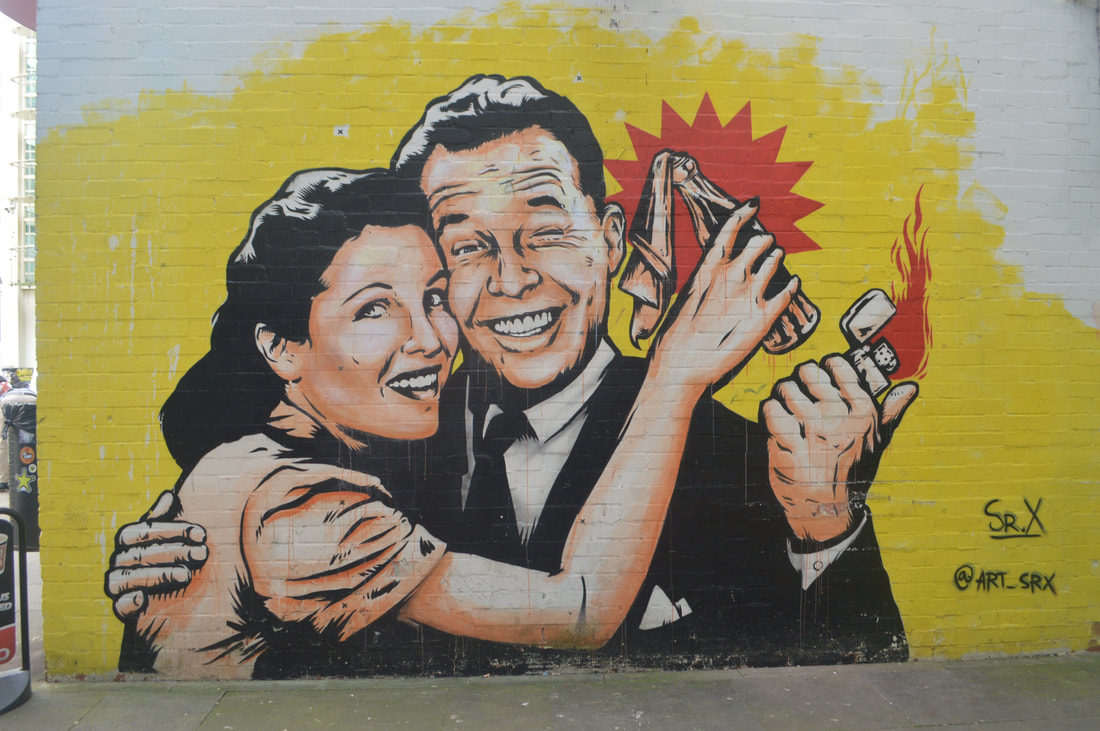
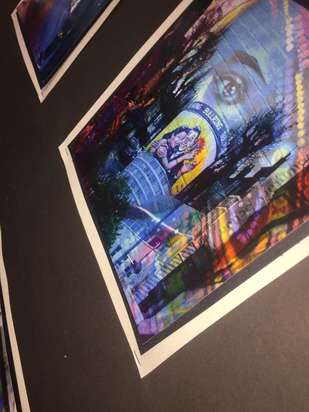
The picture in the middle is a piece of graffiti found in the streets of Birmingham. After resizing above the building of bullring, using transform, I used the skew tool. Using skew helps it look curved and makes it into a 3D view. Then once again used crop so it fits the straight lines of the building from the front view.
The last picture is another piece of graffiti and this is the piece that overlays the entire piece. To get that to become more transparent, I went onto filters and changed the transparency level as well as add different filters to the image.
Work On Showcase
|
|
After finishing my final piece, it was ready to be put on display in our photography class. All the works are set in rows, all having a background of white and black. This is called double layering. From the actual image to the black we had left a 0.05cm gap and from the black to the white we left a 1cm gap. When we all used the same measurements, the final result was absolutely amazing and professional. When we were layering the images and backgrounds together, we used studio gunk as our glue as it was easy to use. Studio gunk is especially useful as it is easy to peel of if there are any mistakes and the marks it may leave can be rubbed of. Take caution though, the fumes are dangerous, so keep the lid closed after use.
